When it comes to decorating indoor spaces for events, trade shows, or personal gatherings, hanging banners can make a significant impact. Not only do they capture attention with vibrant visuals, but they also communicate important messages and can enhance the overall ambiance of a venue. Let’s explore some creative and practical ideas for hanging banners indoors that can transform your space and elevate your event’s success.
Understanding the Basics of Hanging Banners
Before diving into creative ideas, it’s crucial to understand the fundamentals of hanging banners. Whether you’re using trade show hanging signs or custom hanging banners, knowing the basics will ensure a seamless setup.
Choosing the Right Material
The choice of material for your hanging banner is essential. Vinyl is a popular option due to its durability and vibrant print quality. Fabric banners, on the other hand, offer a more elegant look and are ideal for indoor use. Consider the venue’s lighting and the banner’s purpose when selecting the material.
Understanding Banner Sizes and Placements
The size of your banner should be proportionate to the space where it will be displayed. A too-small banner might go unnoticed, while an oversized one can overwhelm the area. Measure your space and choose a size that complements the venue. Also, consider the placement — eye level is optimal for readability.
Creative Hanging Techniques
Now that we have covered the basics, let’s dive into some creative techniques for hanging banners indoors that can make your display stand out.
Utilizing Ceiling Space
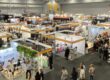
Hanging banners from the ceiling can create a dramatic effect and draw attention from afar. This technique is particularly effective in large venues such as convention centers or trade shows. Use lightweight materials and secure hanging systems to ensure safety.
Layering for Depth
Layering multiple banners can create a sense of depth and dimension. This approach works well for showcasing different products or highlighting various aspects of an event. Use contrasting colors and sizes to make each layer distinct.
Incorporating Backlighting
Adding backlighting to your hanging displays can make them more visually appealing and easier to read in dimly lit environments. LED lights are an energy-efficient option that can be placed behind or around the banner to create a glowing effect.
Using Dynamic Motion
For a more interactive and engaging display, consider using motorized systems that allow banners to move or rotate. This can attract more attention and make your display memorable. Ensure that the movement is smooth and doesn’t interfere with the readability of the banner.
Hanging Solutions for Different Venues
Different venues require different hanging solutions. Let’s explore some options that cater to various indoor settings.
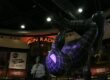
Trade Show Hanging Banners
Trade shows often involve large spaces with high ceilings. Use trade show hanging banners to maximize visibility. Opt for circular or triangular designs that can be viewed from multiple angles. Ensure your hanging system complies with the event’s safety regulations.
Retail Spaces and Storefronts
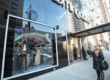
In retail environments, hanging banners can be used to promote sales, new arrivals, or seasonal products. Consider hanging banner signs from the ceiling or against windows to capture the attention of passersby. Use bold colors and concise messaging for maximum impact.
Event Halls and Conference Rooms
For events such as conferences or weddings, hanging banners can enhance the decor and guide attendees. Use elegant designs that complement the theme of the event. Consider using hanging displays as directional signs or to highlight specific areas within the venue.
Customizing Your Hanging Banners
Customization is key to creating a banner that aligns with your brand or event theme. Here are some ways to personalize your hanging banners.
Designing for Impact
The design of your banner should be eye-catching and informative. Use high-resolution images, bold typography, and contrasting colors to make your message stand out. Keep text concise and ensure it’s legible from a distance.
Incorporating Branding Elements
Include branding elements such as logos, slogans, and color schemes that align with your brand identity. This not only reinforces brand recognition but also creates a cohesive look across all your marketing materials.
Choosing Unique Shapes and Sizes
Break away from the traditional rectangular banner shape and explore unique designs such as circles, triangles, or custom cutouts. This can add a creative flair to your display and make it more memorable.
Tips for Effective Installation
Proper installation is crucial for the safety and effectiveness of your hanging banners. Here are some tips to ensure a secure setup.
Selecting the Right Hardware
Choose hardware that is appropriate for the weight and size of your banner. Options include grommets, pole pockets, or snap hooks. Make sure the hardware is compatible with your venue’s infrastructure.
Ensuring Stability and Safety
Safety should always be a priority. Use sturdy cables or ropes and double-check all connections before hoisting your banner. If possible, conduct a safety inspection to prevent accidents during the event.
Testing Visibility and Readability
Once installed, step back and evaluate the visibility and readability of your banner. Ensure that it can be easily seen and read from various points within the venue. Make adjustments as needed to optimize its placement.
Hanging banners indoors is a versatile and effective way to enhance your event or venue. By understanding the basics, exploring creative techniques, and customizing your banners, you can create a visually stunning display that captures attention and communicates your message effectively. Whether you’re preparing for a trade show, decorating a retail space, or organizing a special event, these ideas will help you make the most of your hanging banners.
Professional Skybox Hanging Banner Frame Systems: Safety Specifications & Assembly Guide
For trade show exhibitors and event professionals, selecting a certified hanging banner frame system is as important as the graphic itself. Professional Skybox hanging banner frame systems are engineered to meet strict venue safety codes while delivering maximum visual impact overhead. This section covers the technical specifications, step-by-step assembly, and event logistics every exhibit manager needs to know before show day.
Weight Load Ratings & Rigging Safety Specifications
All professional Skybox hanging banner systems used in trade show environments must comply with IAEE and venue-specific rigging guidelines. Key safety specifications to verify before ordering include:
- Maximum suspended weight: Most convention centers limit hanging structures to 200–400 lbs total load, including the frame and graphic. Always confirm your venue’s rigging weight limit with the general services contractor (GSC) before finalizing your order.
- Cable and hardware rating: Rigging points should use aircraft-grade steel cables (minimum 1/8″ diameter, rated at 7×7 or 7×19 strand construction) with swaged or Nicropress fittings. Never use consumer-grade hardware for overhead display.
- Structural integrity inspection: Before each show, inspect all truss connectors, locking collars, and tension cables for signs of fatigue, bending, or corrosion. Replace any damaged components immediately.
- Fire code compliance: Banner graphics must be fabricated from NFPA 701-compliant flame-retardant materials. Request a Certificate of Flame Resistance from your graphics supplier and keep it on file for venue inspectors.
Skybox System Assembly Instructions: Step-by-Step
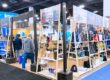
Skybox hanging systems from ExpoDepot are designed for tool-free setup by a two-person crew in under 60 minutes. Follow this sequence for safe, efficient assembly on the show floor:
- Lay out all components — Unpack and inventory the truss sections, corner blocks, tension rods, graphic sleeves, and rigging hardware before beginning. Verify all locking pins are present.
- Assemble the base frame on the ground — Connect truss sections horizontally at floor level. Snap corner blocks into place and confirm all locking collars are fully engaged (you should hear an audible click).
- Attach graphic sleeves — Thread the printed dye-sublimation graphic through the perimeter sleeve channel before raising the frame. This is easier at ground level and prevents accidental drops at height.
- Connect rigging cables to rig points — Attach pre-measured aircraft cables to the designated rigging points on the frame. Have your rigging crew affix the opposite ends to the venue’s approved ceiling pick points.
- Raise and level — Coordinate with the rigging crew to hoist the structure evenly. Use a bubble level or laser level to confirm the frame is horizontal before securing. Adjust individual cable lengths as needed.
- Final safety check — Walk the perimeter and confirm all connections, no swinging movement under gentle pressure, and that the structure clears all aisle traffic by the required minimum height (typically 8 feet per IAEE guidelines).
Browse our full range of professional hanging structures to find the Skybox configuration that fits your booth footprint and ceiling height requirements.
Event Logistics: Timeline & Coordination Tips
Effective event logistics can mean the difference between a flawless setup and costly overtime charges. When planning your hanging banner installation, follow these best practices:
- Submit rigging orders early: Most venues require advance rigging orders 4–6 weeks before the show. Late orders may be rejected or incur surcharges. Confirm deadlines with your event services contact.
- Coordinate with the GSC: Share your Skybox frame specifications and weight documents with the general services contractor during the planning phase to ensure compatible rigging equipment is on-site.
- Schedule EAC labor correctly: If using an Exhibitor-Appointed Contractor for assembly, submit EAC paperwork and insurance certificates by the venue deadline — typically 30 days prior to move-in.
- Plan for storage during the show: Empty cases and packaging must be removed from the show floor after setup. Confirm crate storage availability and label all cases clearly with your booth number and return tag.
ExpoDepot’s team of professional display solutions specialists can help you plan every detail — from choosing the right Skybox hanging banner frame system to coordinating graphics timelines and shipping logistics. Ready to elevate your next exhibit?